Minecraft Ship Tutorial: 30-Gun Frigate
September 9, 2020 8:59 pm in Building, PirateCraft News. 2 Comments
This step-by-step tutorial will hopefully teach you how to build better and more realistic ships. You can use the same techniques shown here to build bigger and smaller ships – I build all of my ships like this, even my massive 120-gun ships!
Description
If you choose to build this ship, I would appreciate if you placed a sign somewhere onboard giving me (Xeron) credit for the design – as this took many hours to make. Thanks!
| Estimated building time: | ~4 hours |
| Block count: | ~2500 |
| Dimensions: | 50 x 20 x 40 (including masts and sails) |
| Materials needed: | 20 stacks of wood planks 10 stacks of wool 30 short cannons |
STEP 1: The Keel
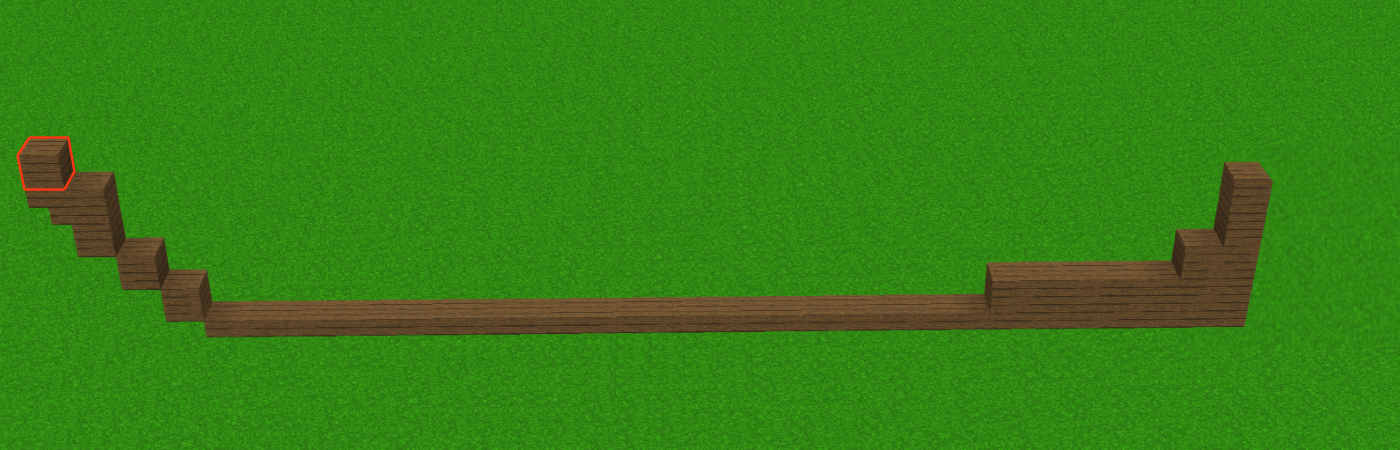
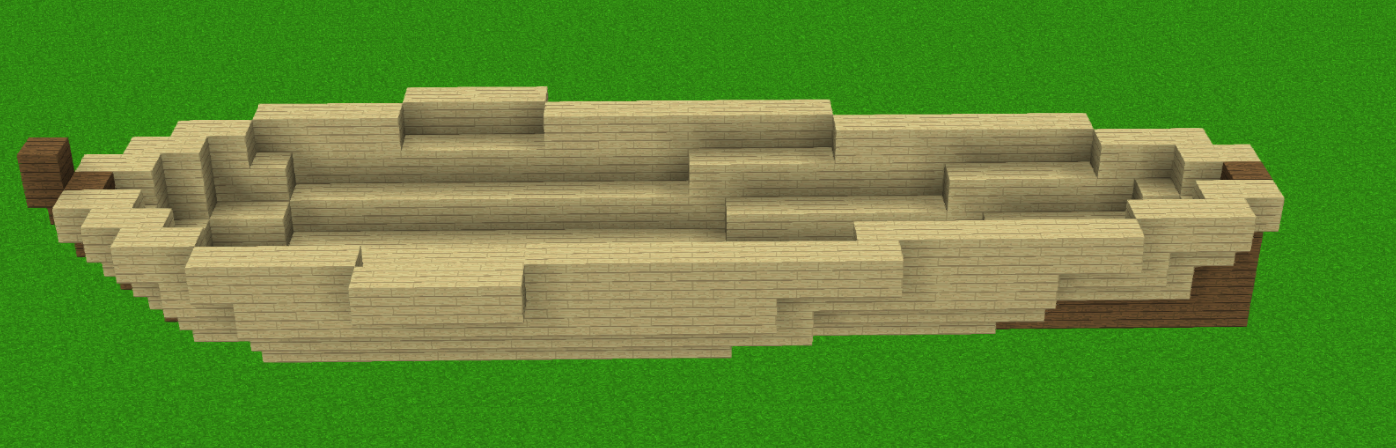
The keep is backbone of your ship, it will determine its size and shape. Start by placing roughly 30 slabs 5 blocks underwater in a straight line. The RED block shown should be the ONLY block fully above water; everything else should be underwater.
STEP 2: The Hull
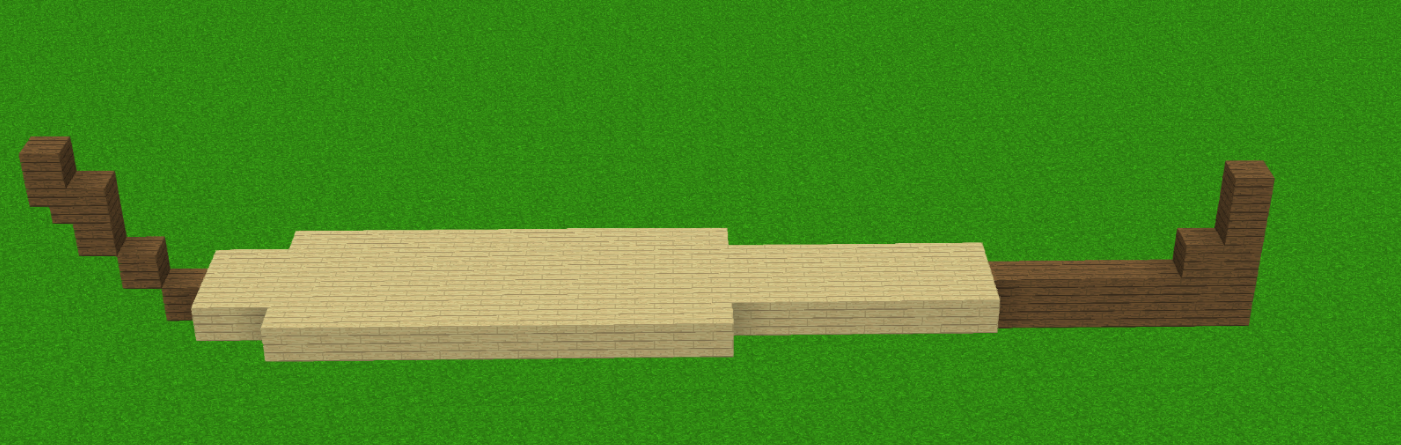
Take a different colour block and start placing blocks in a sort of stretched-out ‘teardrop’ shape. The pointy end should be at the back.
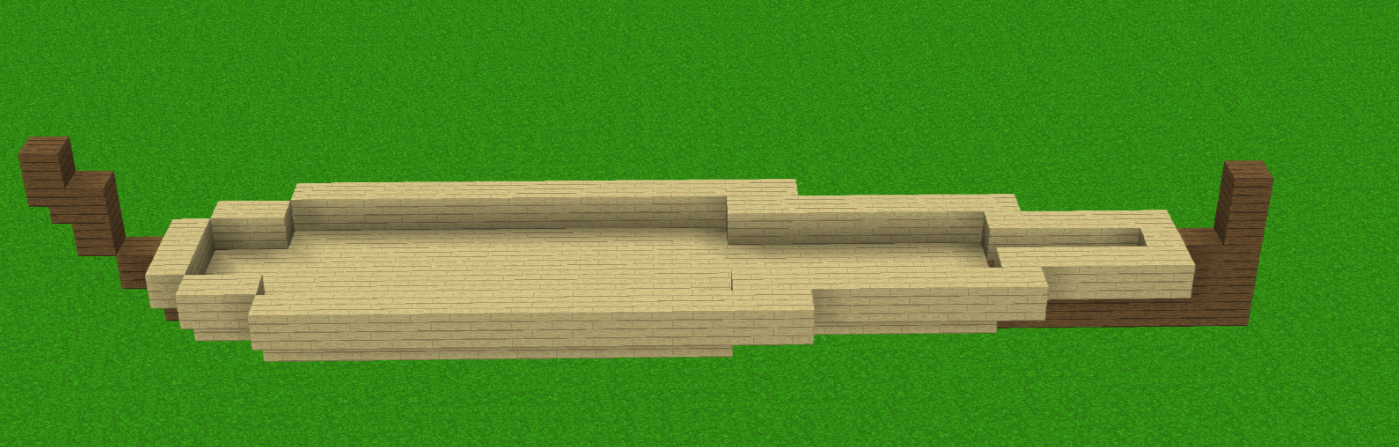
Continue to place blocks in a sort of ‘teardrop shape’ until you reach the waterline. Remember that you can use the same principles to build even bigger ships – just start lower in the water and make it wider!

In most of my ships I like to add some logs, chests, or barrels inside the storage area of the ships. I haven’t included any in this tutorial.
You should now be at the waterline of the ship and be able to drain the water from the inside of the hull.
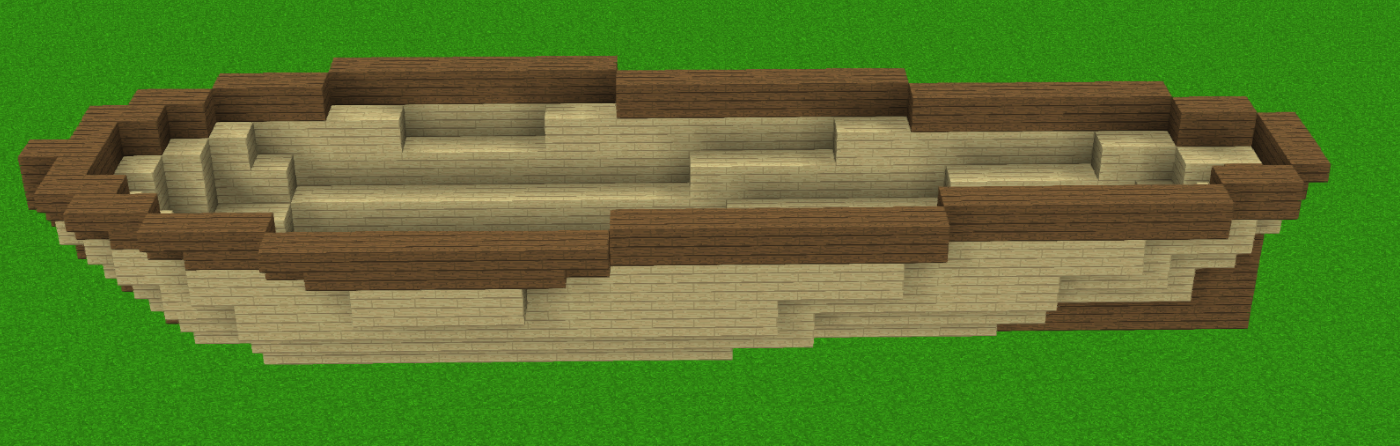
Once you are happy with the shape of your hull, feel free to add some stairs or slabs underwater to make it look smoother. For simplicity, I’ve chosen to stick to solid blocks underwater – I only use stairs above water.
STEP 3: Deck and Rudder
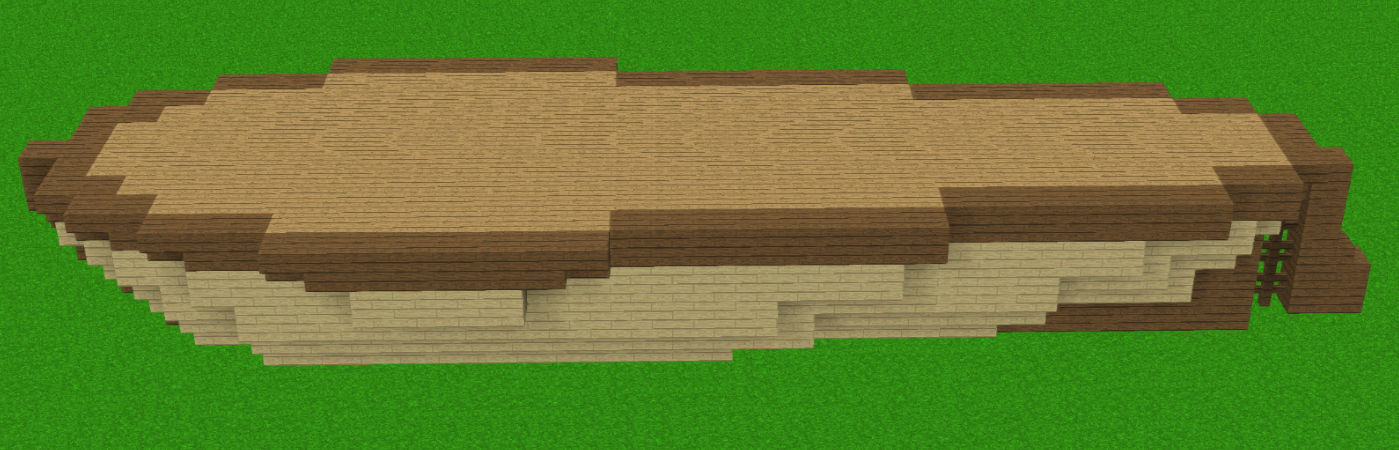
Fill in the deck with slabs and add a rudder at the back of the ship.
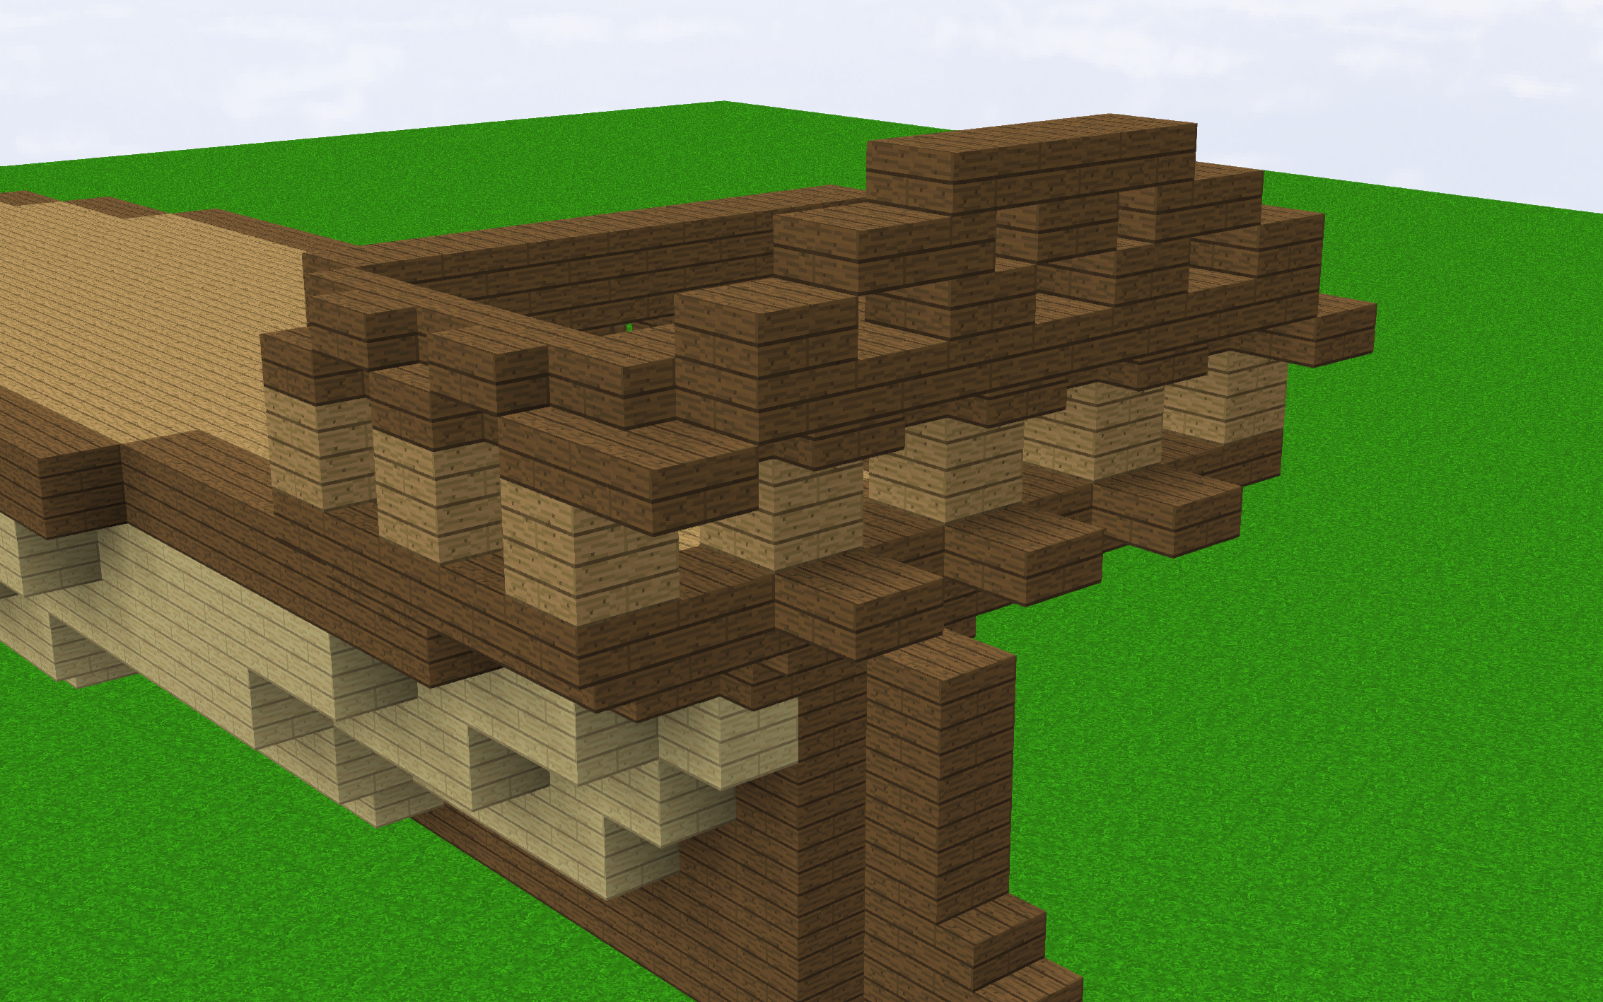
STEP 4: The Gallery

The back of your ship should look similar to this now – a little bit rounded with the rudder sticking out of the water a little.
The big fancy cabin at the back of sailing ships is called the ‘gallery’ and is where the captains would sleep and live. Start by replacing the blocks at the very back with some stairs and slabs to make it look smoother.

Create a sort of ‘box’ out of upside-down stairs that is 5 blocks long. The width will depend on how big your hull is. As a rule of thumb; make it 2 blocks less-wide than the width of your hull. In this case, my hull is 11 blocks wide, so my ‘box’ will be 9 blocks wide as shown.

Using a secondary colour, add the window holes. You can add a wall and door at the back if you want your cabin to be closed off.
Use stairs and slabs to add some decoration to the top part of the cabin – make it unique! There isn’t a ‘correct’ way to design the gallery – real life ships looked very different from one another too.
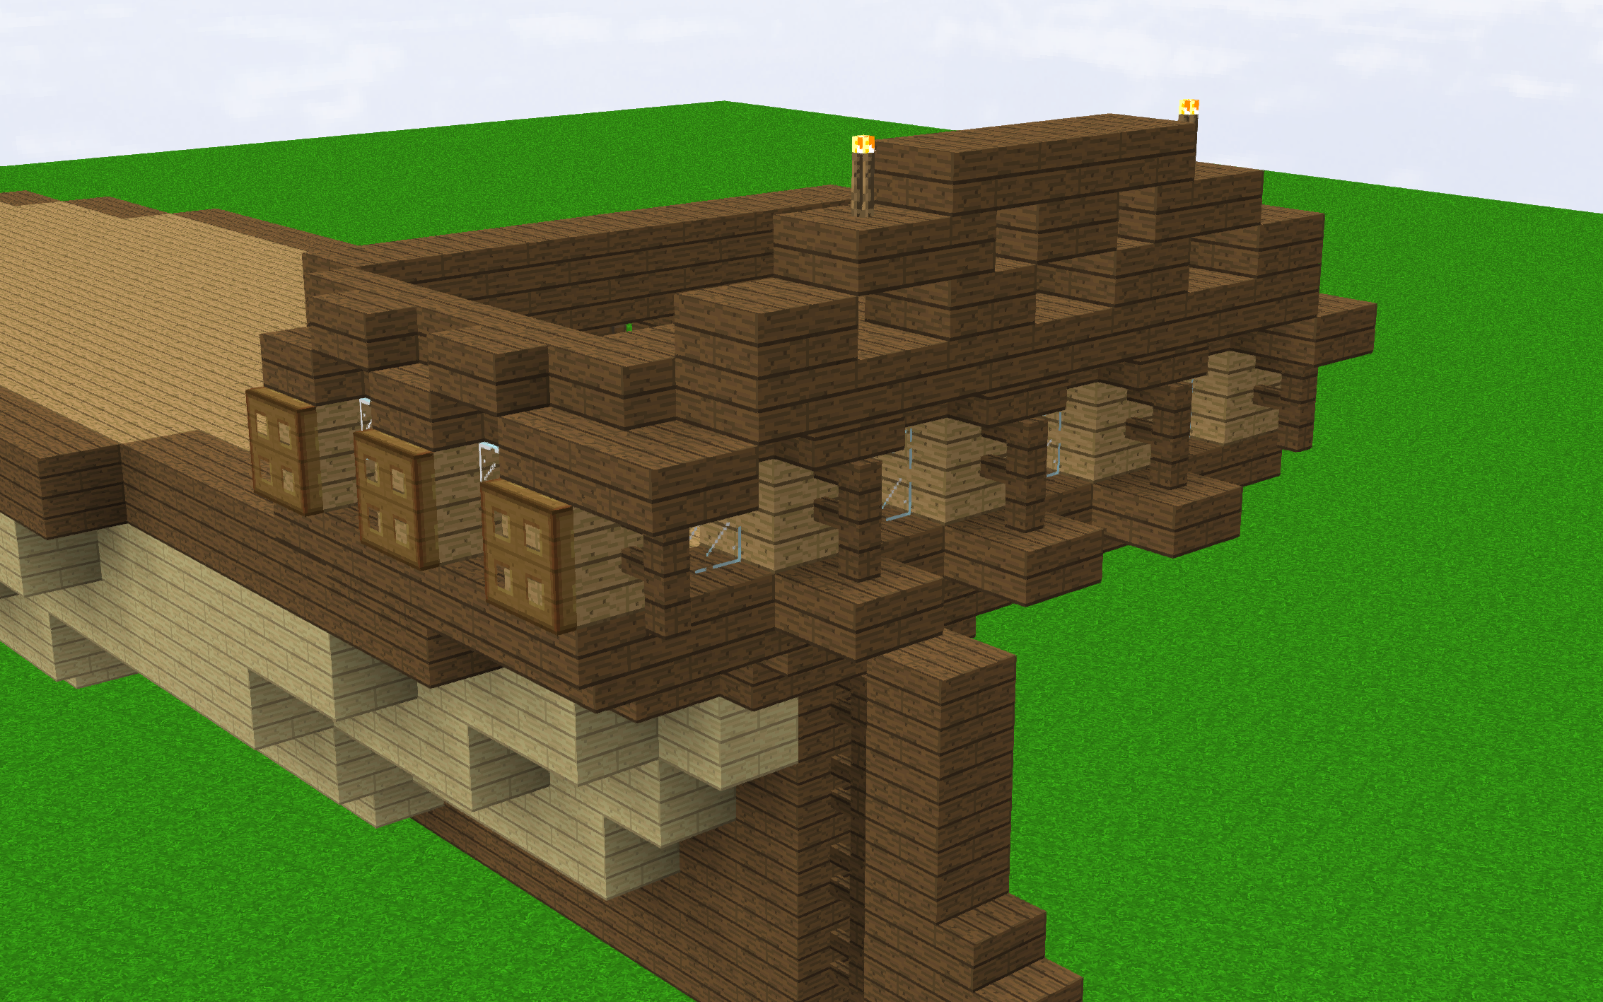
Finish off the gallery by adding some windows, torches, and some final decoration. I’ve also attached the rudder at the bottom to the ship with fences – forgot to do that earlier (sorry).
STEP 5: Gun-deck

Your ship should now look something like this. Start by placing a single block at the very front of the ship, and making sure the hull is the correct shape – this is the last chance to make any small changes before we add the cannons!

Using a secondary colour, add the gun ports with a spacing of 2 blocks between them. I’ve also added the support for the ‘bowsprit’ at the front – this is the mast that pokes out the front of the ship. The support usually carries the figurehead and fancy decoration – but you can do this later.
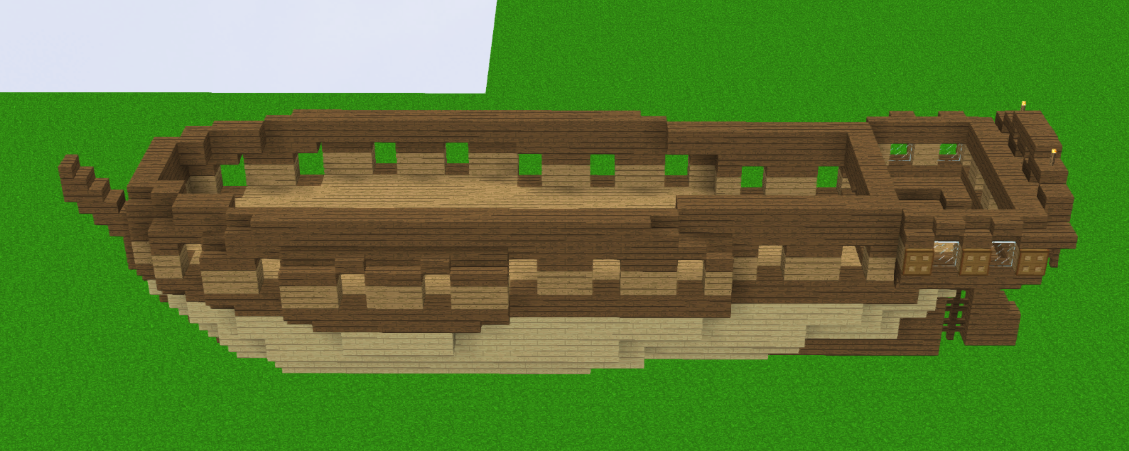
The widest parts of your ship should start to curve inwards now – this is called ‘tumblehome’ and was intended to be an early attempt at sloped armour, with cannonballs bouncing off the sides. Try to make your sides curve inwards a little bit.

Finish off the gun deck by adding its room… the main deck. Realistically the decks of the ships would all be a little curved, but this makes the rest of the ship much harder to build, and wastes a lot of space for what is a very very small detail – so I don’t bother.
STEP 6: Main Deck
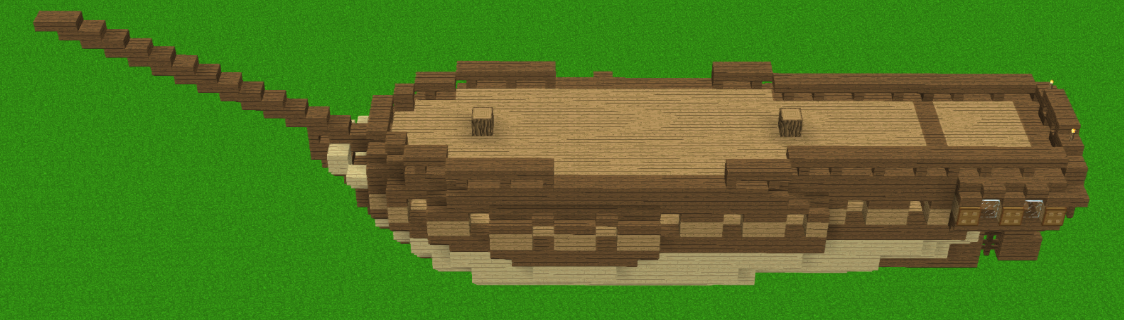
Add the bowsprit to your ship… it should be a little less than half the length of your hull. For example, my hull is about 35 blocks long, so my bowsprit will be around 15 blocks long.
The masts should be placed in the rough positions shown. Also add some ‘railings’ to the side of your ship – I used slabs and stairs but you can also use fences or solid blocks.
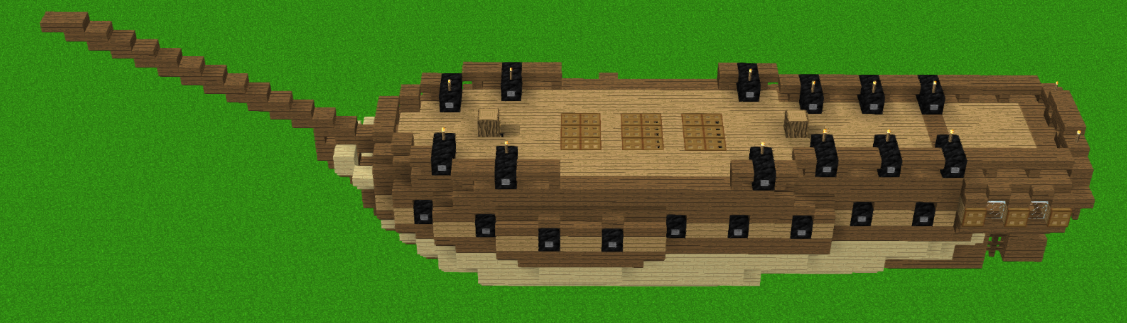
Cannons! I’ve chosen to use the 2-block long ‘cast iron short cannons’ on my ship. Personally I prefer when they don’t poke out of the ship but that’s down to personal preference.
Be sure to also add some hatches in the centre, and ladders down your masts so you can get to the lower levels.

Finish off the main deck by adding a small (optional) lifeboat, some more railings, a small steering wheel at the back (a stair on top of a fence post), a figurehead, and some small platforms to tie down the rigging (the 3-long oak planks on the side of the ship).
STEP 7: Masts & Spars
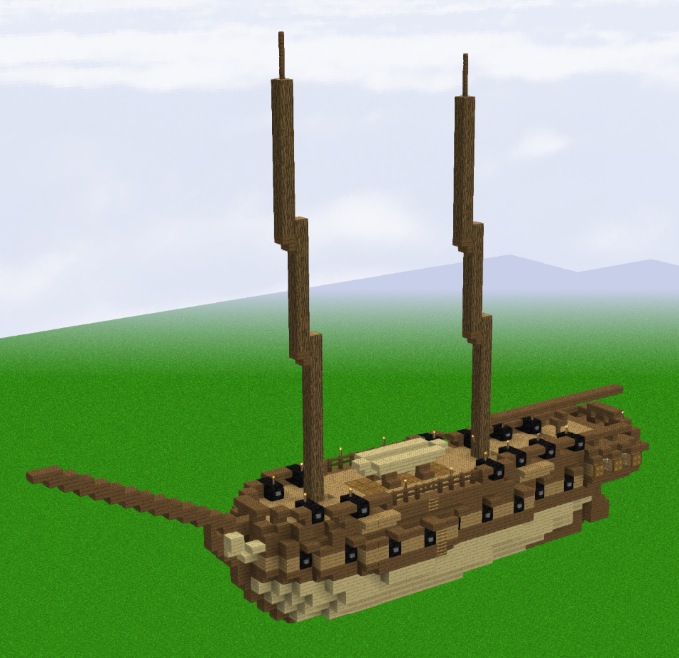
Your masts should touch the very bottom of your ship, and should be as tall as the length of your hull. In other words, my hull is about 35 blocks long, and the height of my main mast from the bottom of the ship is about 35 blocks. The smaller mast should be a few blocks smaller.
Both masts should be leaning forward slightly as this will help with the sails, crows’ nests, and rigging.
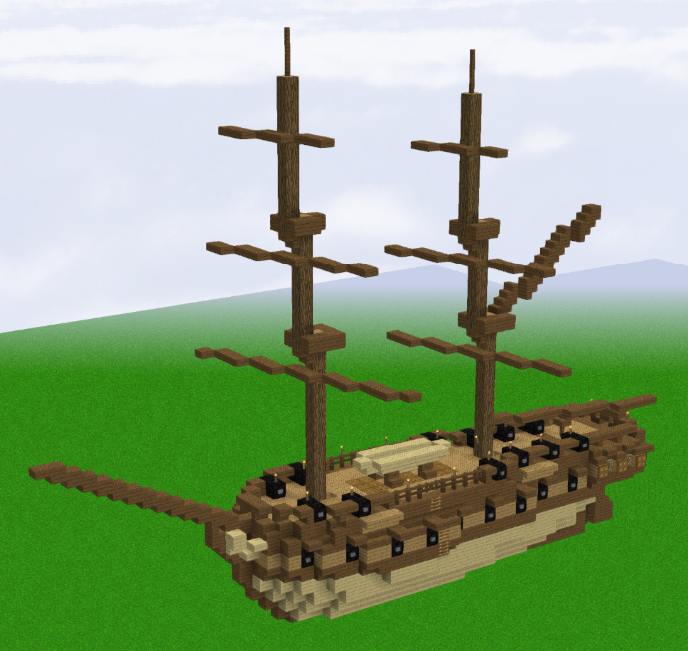
Add the bits that hold the sails (these are called ‘spars’). I like to angle mine a little to make my ship look more fancy. Remember to add a spar at the back of your ship to hold the sort-of-triangular sail at the back. Don’t forget the small platforms on the masts.
STEP 8: Rigging
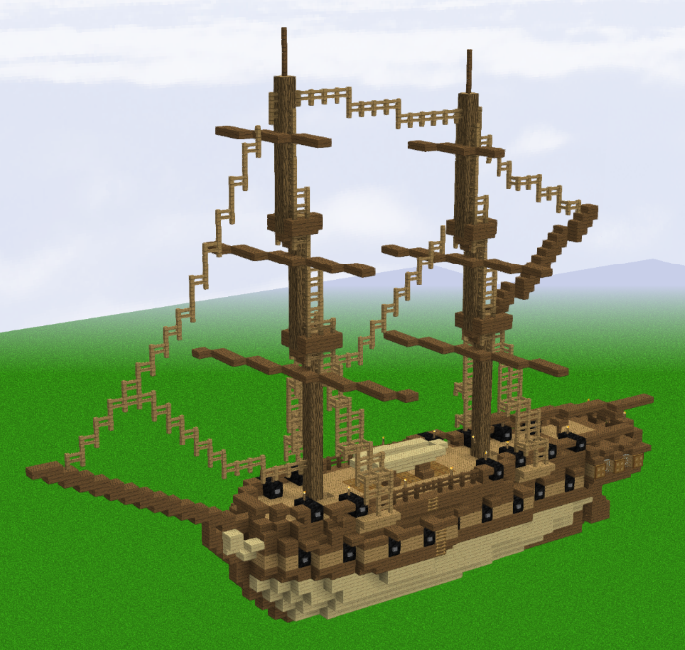
Easily the most annoying part of the building process… I don’t really have any tips here. Try to make things droop a bit by giving them a ‘U’ shape. Give it your best shot!
STEP 9: Sails
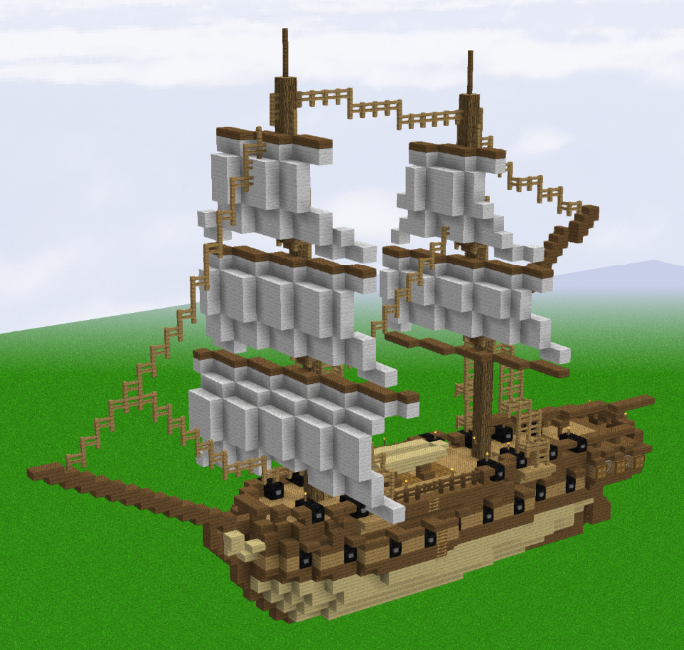
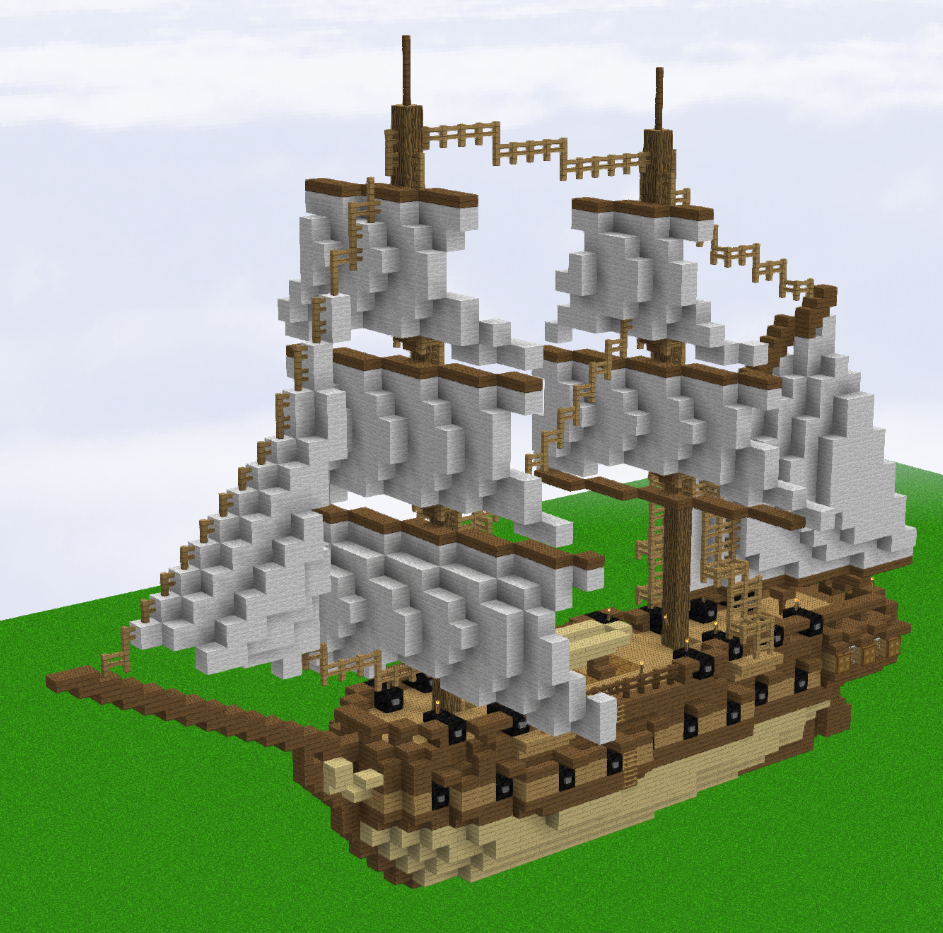
Add some ‘chunks’ of sail. Its much easier to build your sails like this and make them prettier later, than trying to make them look pretty from the start.
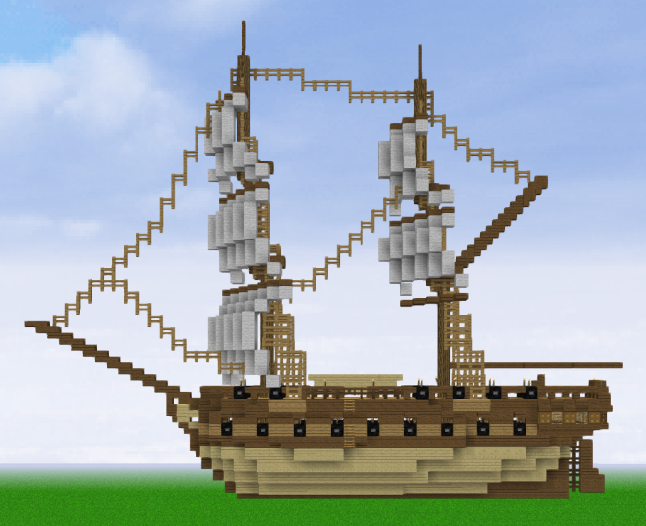
This is the same picture as the one above from a different angle to help you with your sails and rigging.

Add the so-called ‘flying-job’ (front sail) and ‘spanker’ (sort-of-triangle sail at the back). I don’t have any tips for these either, they’re pretty fiddly.
STEP 10: Finishing touches
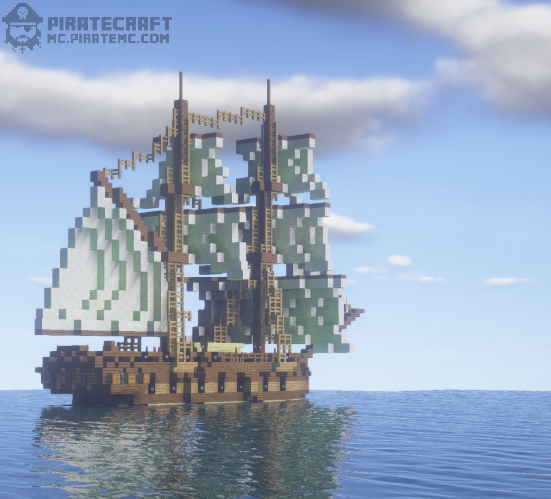
Make the sails a bit smoother by adding/removing some of those ‘blocky’ sails, add some torches, chests, and cargo and you’re ready to sail!
View Other posts by Xeron
Written by Xeron
Categorised in: Building, PirateCraft News
Tags: Boat, Frigate, Indiaman, Pirateship, Sailing, Ship
Posted on September 9, 2020


2 Comments
khurram khan
Wonderful guide, thank you.
William George
Instructions a little vague but other than that it’s a brilliant build and one of the best I’ve done